I have a new website! (No, I don’t…;)

7a9516_1785e6907e184506a3a3f73a7e314e73

So, I just linked this blog that you’re reading here, up with my new website! My website is called Modern Making and it’s kind of a way for me to feel a little more organized about my creative endeavors because I can keep all my info in one place that makes a little more sense to me. One piece of it is this blog so when you visit the blog page on my website, you’ll actually be visiting this blog. I’m making a few changes too. Like, consolidating my two Etsy shops into one; moving my free crochet patterns from my blog to their own page on my website, and probably some other stuff too.

IMG_0849

In other news, the library is coming along nicely. In fact, we are on track to finish this weekend. Only things left are trim, light, and floor. So far, I’ve been able to resist the urge to put all our books in there. We are allowing the paint on the shelves to fully cure so the books don’t get stuck to it. It’s been quite an effort, as I am totally the person who puts stuff all over paint as soon as it’s dry to the touch; which basically means it’s not even dry. I’m respecting this project by not doing that this time. Here’s a little peak. Don’t worry, I’ll put 800 or so pics of the whole process up hopefully next week. Yay!

Posted in Crafts | Leave a comment

Happy January!

79440504-9bd4-49d5-9d6a-43a90456a92b

This is what I saw as I was walking out my front door this morning to walk the girls to school. It’s a phone pic (btw, my Nikon is mysteriously out of commission for the time being so it’s phone pics for a while) but it’s sooooo pretty with the water and the snow and the mountains and the sun…love it here. Love it.

Wow… It’s been so long since I’ve done this; I kind of feel like I don’t remember how… But I will certainly give it the ol’ college try. I’ve made so many changes over the last six months or so…schedule changes, work changes, creative changes, and new stuff like house projects and hobby projects have also begun. I am going to try to catch it all up here and then move forward with much less time between blog posts; mostly just to maintain my own sanity because this is kind of how I lay it all out and keep things straight in my brain.

In fact, one of my schedule changes includes making Thursdays my special catch up on all my bloggy online crafty business stuff day. I’m very excited about that because time seems to be my greatest challenge. And now that I’m working a lot of the time, it’s been even worse trying to manage time to do the things I like to do. But, alas, I am here, actually doing it. It’s the first 2016 Thursday for me stuff and I plan to keep it going throughout the year. I did something smart and actually left the house to do this so I wouldn’t get distracted by dogs and dishes and laundry. Here’s where I am right now. See how quickly I got distracted by dogs anyway?

328e7644-e20f-45f2-8eaa-8356dbd7848b

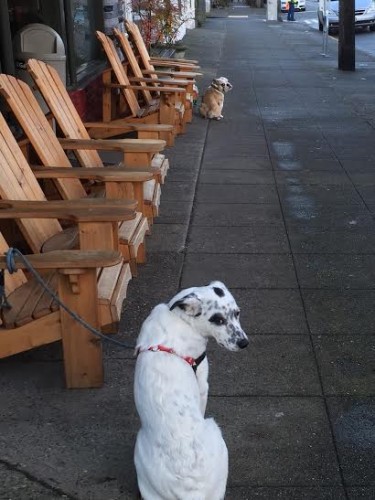
I took this because the dogs were displaying such cute body language. The little bull dog is sulking because she is tied to a chair and the other one is trying desperately to get her attention. I’m entertained by nearly anything right now. So, here I am doing my Thursday thing. On with the updates…

Remember my sewing closet?!

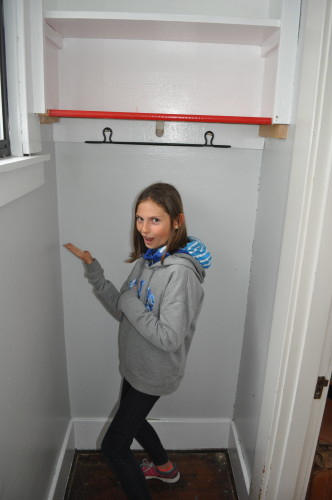
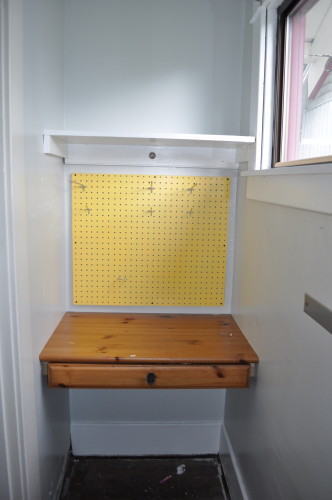
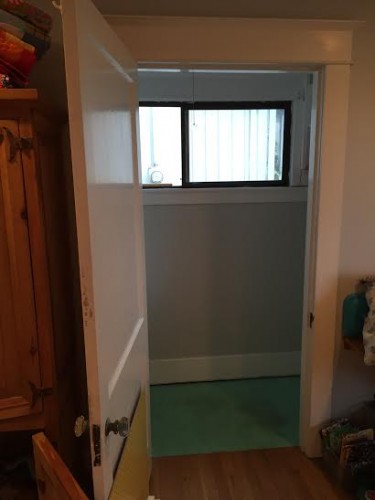
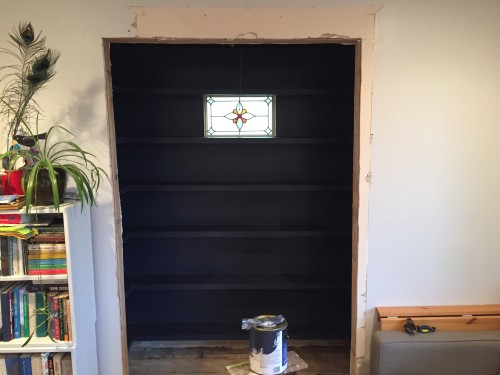
Well, we’ve had a bit of a change around the house… Don’t get me wrong; I loved my sewing closet while it lasted and it served me well, but we saw an opportunity with that space that I know will serve the entire family even better and hopefully forever. So, I gutted the sewing closet that was originally a coat closet. And it basically looked just like it did before the sewing closet project began.

1b1a4fa8-872c-4b80-9ac8-1e638577c921

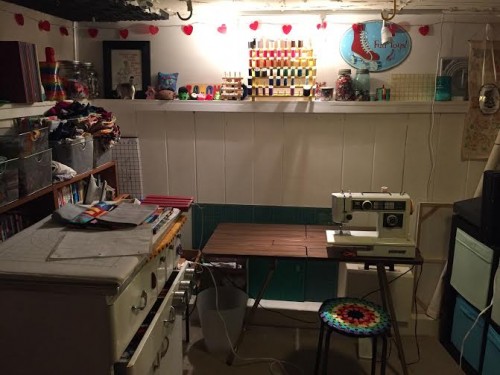
And my sewing set up is now in the basement.

f4b317ac-6948-4daf-9941-86f08a40b5c2

The kids are upset that I’ve taken over “their play space” with all my sewing crap but honestly, they’ve both been sewing their butts off down there so I’m not convinced.

So, you may be wondering what all the fuss was about…?

This is a photo I found on Pinterest. I actually tore this very page out of a Real Simple magazine years ago, before Pinterest was a thing; when we creative types tore pages out of magazines (which is basically Pinterest 1.0, right?). Anyway, I still have this torn out magazine page and it’s taped up on the wall next to the old coat closet/recent sewing room/soon-to-be library.

download

You love it, right? I love it. We love it. We are totally doing this. It’s the most perfect space to do this. Not to mention the facts that one, I’ve dreamed of having a personal library for as long as I can remember; two, we have approximately 8 million books in the house; and three, I kind of want to be a librarian when I grow up (and now I don’t have to wait, or even go back to college). Plus, the kids have been making all kinds of unreasonable demands for ridiculously complicated and architecturally unattainable “book nooks” or some such and when we showed them our plan they pretty much freaked out with happiness and excitement. And Dave loves it because it’s a project that doesn’t have to do with a sewing room or a sewing table or sewing. It’s a win win win win.

Spoiler alert! – We’ve already begun and the hard part’s over. Here’s a sneak peak at the progress, but I’m going to do a full project post by month end because that is the deadline for project completion here. Really. It will be done by the end of the month. Gawd. I’ve threatened to melon baller one of my eyeballs out if it’s not. I’m crocheting myself a sweet eye patch just in case.

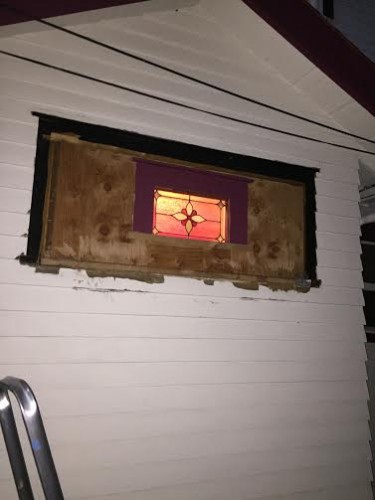
Again, spoiler alert! – we removed the giant, old, didn’t make sense, inefficient, terribly installed, cold cold window (by we, I mean Dave); and replaced it with this awesomeness we happened upon at Ballard Consignment. Totes adorbs, right?

3c6d6094-3621-42f3-bba0-0a19ae07fc46

We’ll talk next Thursday!

Posted in Crafts | 2 Comments

Quick Vintage Estate Sale Quilts!

DSC_0006

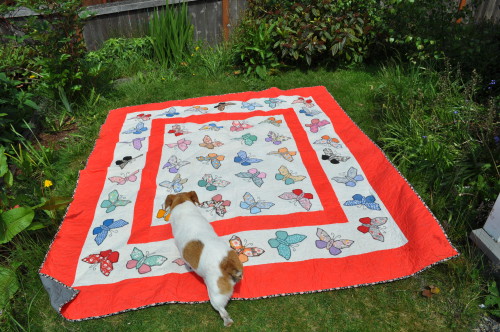
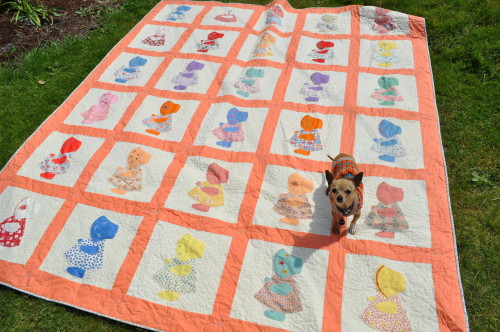
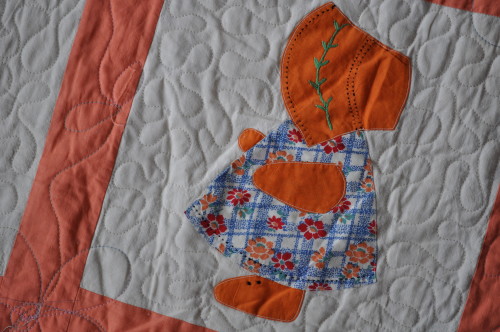
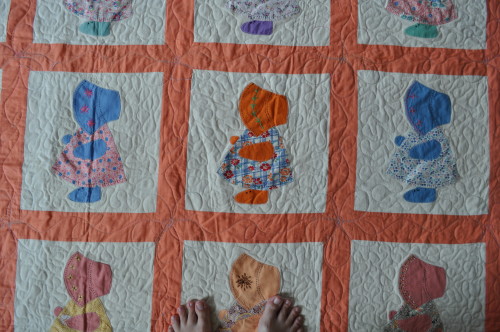
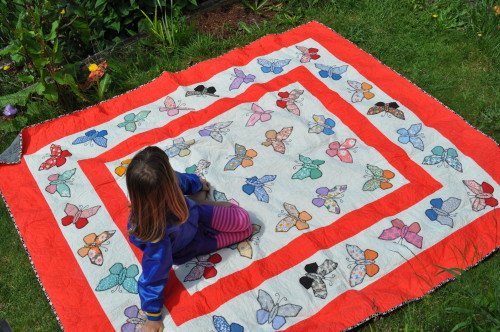
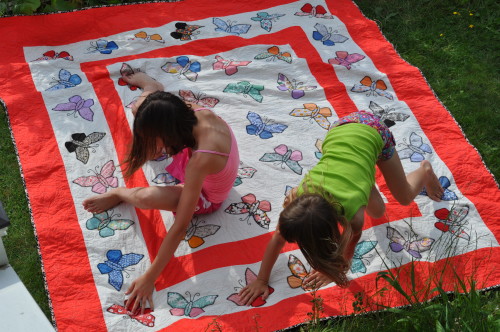
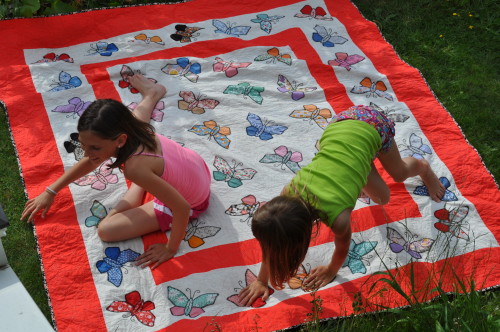
So, I found two quilt tops at an estate sale near Seattle not too long ago and was instantly in love with them for several reasons; first, because they are completely completed quilt tops (the hard part is done!!!); second, because they show two of my favorite motifs: sun bonnet sue and butterflies; third, because they are hand embroidered applique in great colors and prints (there is clearly a lot of hand embroidery and the applique looks to be a combination of machine and hand stitching); and finally, because they were super cheap.

DSC_0010

Seriously. I kind of ran to the car and felt a little like I was doing something wrong. It was great. Plus, it felt so much better to me bringing home a nearly finished fabric project than a pile of fabric to add to the stash that is kind of always weighing on the back of my mind.

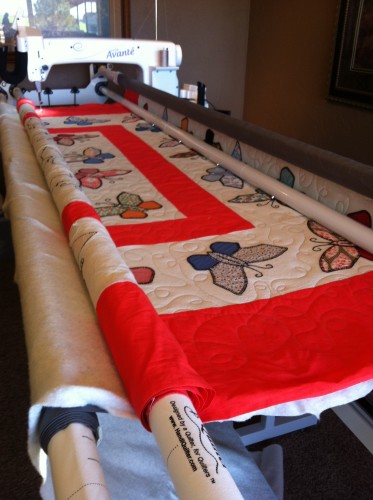
I did not want them to just get stuffed somewhere and forgotten so I made immediate plans to quilt them at my mom’s which takes some planning as it’s about a 2-hour drive (with a potentially snowy mountain pass about half the year). And I know I’m not supposed to, but I did buy two cheap sheets for backings. Ugh. I don’t want to hear about it. My reasoning is simple. I sometimes sacrifice quality for savings which is something I’ve spent the better part of my adult life recovering from; but in this case, I figured that I spent very little on them to begin with; the sashing fabrics appear to be not so high quality solids and the block backgrounds are simply muslin, so all in all, I didn’t want to spend a bunch on backing if the things were going to possibly fall apart in the wash. Because I surely planned to use them (and so did the kids and the dogs) and wash them in my washer and dry them in my dryer. Often. To make up for it a tiny bit, I did get good quality cotton batting.

I am a total beginner at free motion long arm quilting so this was another reason not to invest a whole lot of money. I did an all over swirl/squiggle/wave/loop design (I know there’s a name for it, but I’m not a professional) on the butterfly top and it went pretty well.

IMG_2521

Next I loaded the sun bonnet sue top and decided to get extra fancy with a free-hand leafy vine through the sashing and a flower at every sashing intersection.

DSC_0005

DSC_0004

I left the block backgrounds black so I could go back and a stipple pattern. About half way through the vines and flowers, I realized that trying to do two quilts in a day was not a terrific idea. Mostly, my mom told me from then on, I was not allowed to do more than one a day. I think I was stressing us both out. Partially because I don’t know how to troubleshoot that giant machine, I can’t change the bobbin, and I’m pretty sure I don’t know how to thread it correctly.

IMG_2524

So, after a very long day of quilting, (with Boyd manually squished into a small basket at my feet – long story), I discovered that I hadn’t lined the backing up well and the bottom edge of the quilt was quilted to the machine. I was pretty much screwed. So, I turned the machine off, closed the doors to the quilting room, and slowly backed away. (I went back a different day to fix the problem and finish the quilt.) Now that it’s all said and done though, I am pretty happy with the results.

DSC_0013

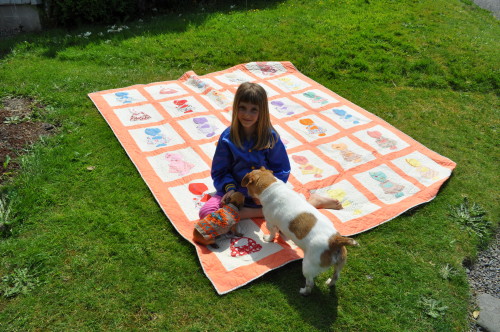
These two quilts have quickly become our summertime lawn quilts and they have held up nicely in the washer and dryer.

DSC_0007

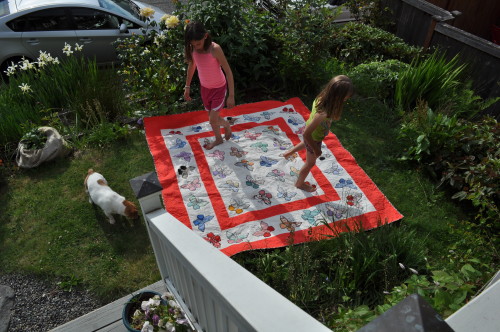
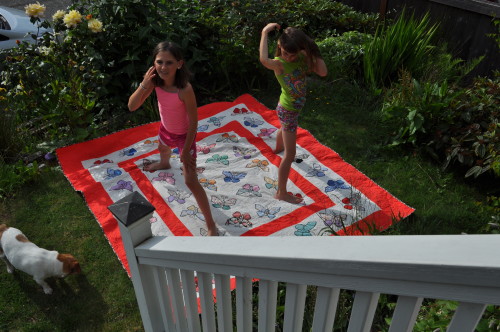
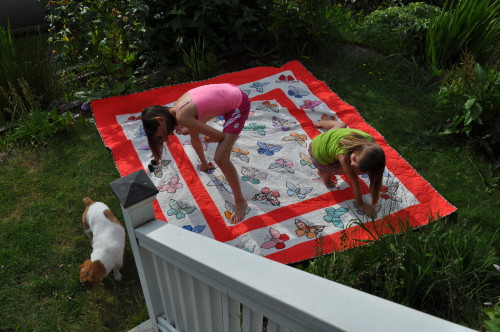
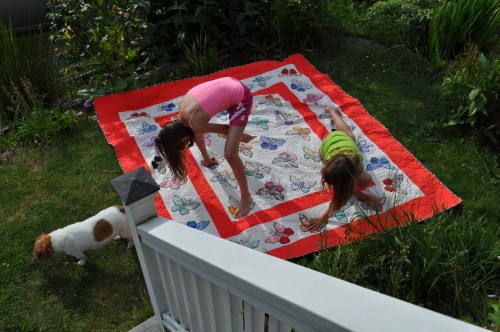
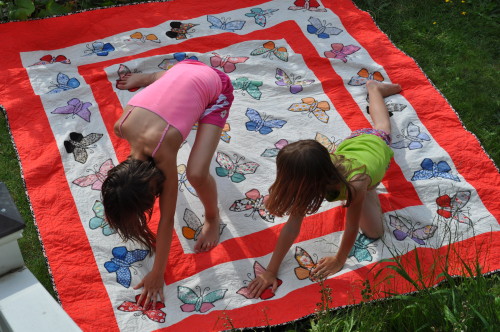
Plus, the kids invented a new “Butterfly Quilt Twister” game that is pretty awesome. I have to say, they are kind of at a perfect age – big enough to come up with something like this (and actually make it work), and little enough to be adorable doing it.

DSC_0061

DSC_0062

DSC_0063

DSC_0064

DSC_0066

DSC_0067

DSC_0068

Happy Summer!

Posted in Crafts | Tagged , , , , , , , | 1 Comment

Fabric Stash Annihilation

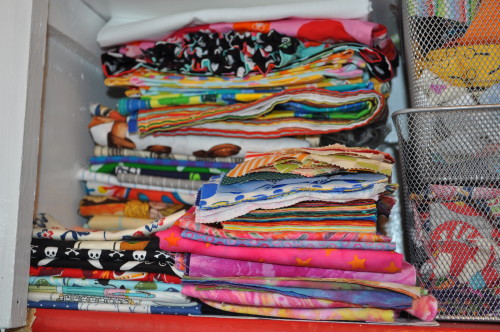
In an effort to really get all of my sewing stuff squozen (yes, I understand that’s not actually a word; but it should be) into my little sewing closet; I’ve decided to take quite a historically different and ground-breaking approach to the management of my fabric stash. I’ve acknowledged that I may well never use some of my fabric and that it really doesn’t need to stick around any longer. Gasp! I know. You may be thinking something along the lines of: “Are you mad?” “Isn’t that the point of a fabric stash? – taking up tons of space for no reason at all!?” “What are you going to pet, admire, refold, and shuffle around when the mood strikes?” Well, I would say to you firstly; yes, all those thoughts are valid; however, I have come to realize with a bit of experimentation, that my actual joy and creativity are being strangled by keeping extra stuff around. And specifically, my sewing energy is being smothered under too much fabric. With this in mind, I decided to not just “reorganize” my fabric this time, but to make a plan to get my collection to a meaningful, inspiring, and much smaller size.

My intention is to use it more than anything. I certainly did not start this process with the intention of chucking perfectly good fabric out the door for the neighbor cats to sleep on (I’m pretty sure that’s a dangling participle, but it’s too late to think too much about grammar; also, I could be completely wrong because I’m no expert). So, this is what I’ve done.

DSC_0088

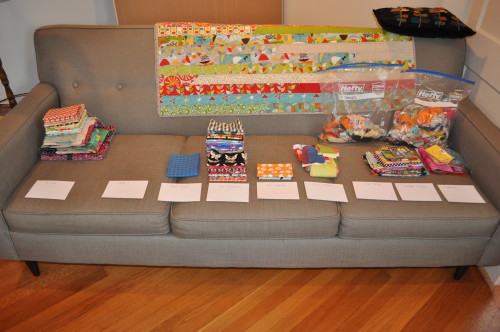
I sorted my fabric by cut size. I like scrappy stuff and lots of color and contrast so this makes it better for me when I’m doing projects. Ultimately, size is what I’m after, not anything matchy-matchy. I didn’t want to go crazy with too many cut size categories though. After much thought (about 30 seconds of actual thought and planning – long enough to clear off the couch and find a Sharpie to label the piles), I decided on these 10 categories – which sounds like a lot:

1.) 1-yard or larger
2.) half yards
3.) fat quarters
4.) fat eighths
5.) 2 1/2″ strips
6.) 1″ strips
7.) specialty & precuts
8.) too small to categorize effectively a.k.a. “scraps”
9.) stringy bits and selvedges
10.) to get rid of

I like to think that every little bit of fabric can be used so I’m categorizing with that in mind. The first four categories are pretty self explanatory. The 2 1/2″ strips are because they work for many scrappy quilt patterns, plus they make great binding for whatever. And…I totally want to make a bargello quilt with them!

DSC_0004

The 1″ strips are for a quilt-along/throw-down/competition that my mom and I are doing completely by ourselves and we totally made it up.

DSC_0006

I’ve separated them into darkish and lightish baskets so they’re easy to grab when I’m making the blocks. I think they’re “church steps” and I’m kind of trying to do lightish opposite lightish and darkish opposite darkish on each block. I’m discovering that most of my fabric is mediumish so I’m not sure the final result will show much contrast, but we may never know because I think I have to make something like 272 of these six inch blocks to achieve the size I want. I may need to collect donations of tea and chocolate to get through that. I’ve never even come close to a king-size quilt. Something tells me not to be surprised if it turns out to be a slight rhombus as opposed to an actual rectangle because there is no way (NO way) that thing will square up for me in the end.

DSC_0008

The ninth category is because I have some kind of crazy wasting issue as if I’d personally experienced the Great Depression (I’m referring to the 1930’s, not present day)… I’m thinking of what to do with the stringy bits. I’m actually entertaining the idea of connecting them all and crocheting a rag rug with it. That sounds like a huge terrible mess now that I see it in print. It may happen one of these days when I’m feeling especially little house on the prairie-esque. We’ll see. Oh, and I almost forgot! There are now threadcycle collection sites around town so if I don’t end up using it, I won’t feel bad about dumping it since it won’t be going into the garbage. It may actually get recycled into something awesome…or it will end up on a barge to China, or burned in a huge heap on an island somewhere, or in Burien. Who really knows? Honestly, I should just label that category “garbage” and get it over with…

Category number ten represents my great mental achievement of letting go. I’m going to sell the fabric that is desirable online (in fact I’ve already succeeded in selling quite a bit – yay!).

And, if you’re thinking that I’m ultimately just shuffling my existing stash around; you would normally be correct. This time, however; I’m actually taking 90% of all the fabric in the first four categories (which is most of my fabric) to my after school sewing class where the kids will be using it to complete projects.

DSC_0011

My quilts in progress went into baskets (if they could fit).

DSC_0005

DSC_0010

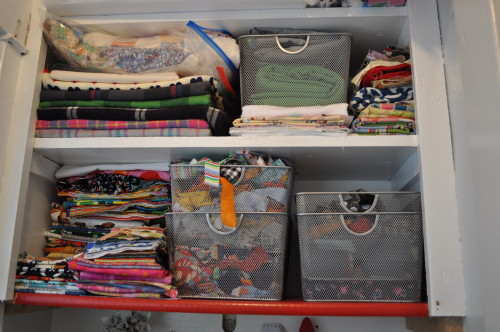
And then everything went neatly on the shelves…for the most part…

DSC_0001

…and I’ve never felt more like sewing! Plus, I can even see my sewing machine and find my scissors, which is helpful!!

Posted in Crafts, Organizing, Sewing | Tagged , , , , , , | Leave a comment
Link

My sewing closet is finally finished!
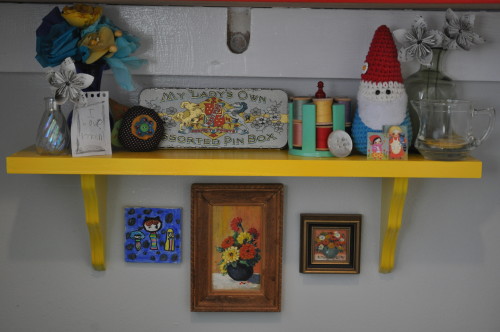
DSC_0048

So, in this house with limited rooms, I converted the coat closet into a sewing room (by “I”, I mean Dave) when we moved in but this week I actually put the finishing touches on it! And, this time when I say “I”, I mean me! Dave was gone for five days and it pretty much took me that much time around kids and work and laziness, etc. The bonus for him was that he didn’t have to live through the huge mess I made. This is an example of what I mean by “mess”.
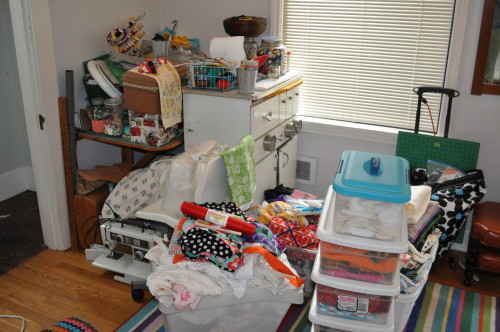
DSC_0008

More on the that later. The mess, I mean.

Okay, get ready for a bunch of boring pictures. This little closet is difficult to photograph because most of the action is split between two sides and the door is just a regular door so there’s no way to get it all in one shot. Here is what it looks like from the outside. It’s the part of the house on the right side that sticks out like a pop-out camper. Seriously, there’s no foundation under there; just downspouts. I’m half expecting for it to break off of the house one of these days while I’m sewing in there. That’ll be embarrassing…and will most likely result in a difficult to explain injury.


DSC_0042

DSC_0046

I loved the idea of using the coat closet as a “sewing room” for a few reasons: It has a door that closes for mess hiding; it has a big window (south facing though, which is less than ideal for artist types like me…ok that was totally not serious talk right there); it has a light; plus, my sewing table fit inside perfectly after Dave skill-sawed off the legs and sides; but the main reason was that I didn’t want to sew in my car.

So, I began this adventure by gathering up all my sewing crap and dumping it in the living room. I even brought all my sewing related stuff up from the basement. I emptied the closet as well. It wasn’t pretty.
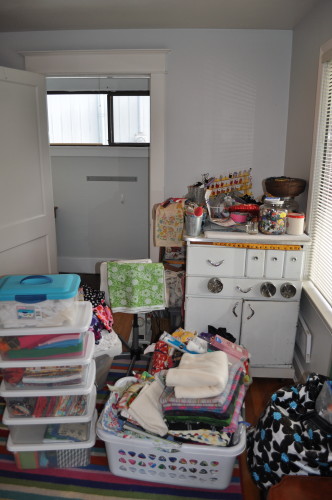
DSC_0007

Here are the official “before” pictures…here is the straight on view…
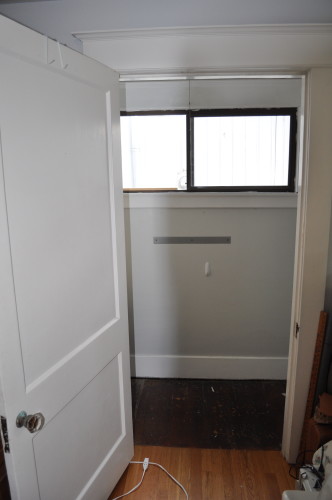
DSC_0006

Here is the right side…

DSC_0005

Here is the left side…

DSC_0003

And so, I painted the floor with leftover random paint from the basement. Yay free!
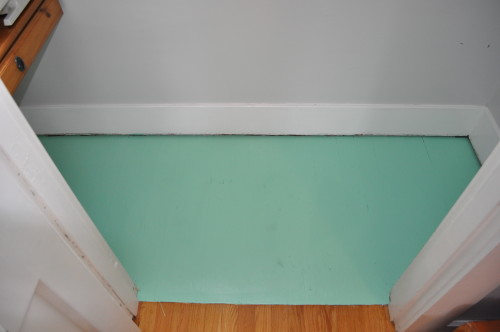
DSC_0016

Plus, while the floor paint dried, (which was not floor paint at all, but leftover regular paint that I’m pretty sure won’t be good at all on the floor in the long run) I went through the mountain of sewing paraphernalia piled high in the living room. This is what the mountain looked like after day one. Kind of a little smaller.
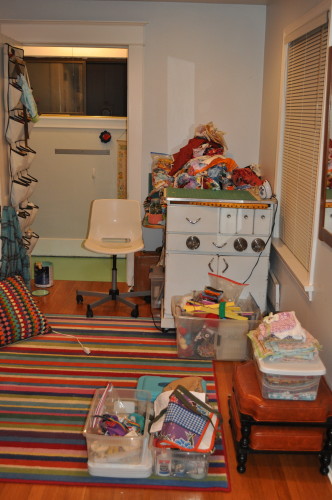
DSC_0015

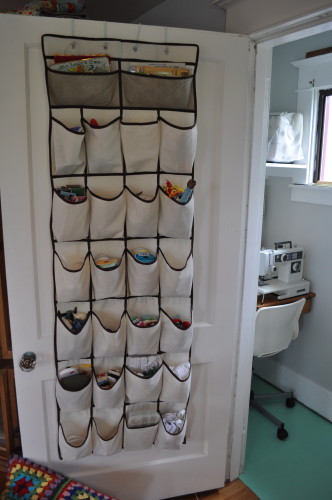
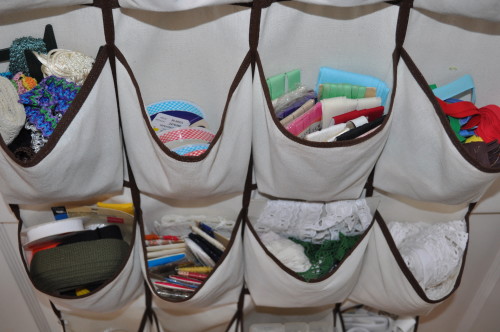
And here is what I have over the inside of the closet door to hold all the little stuff. I use these all over the place in the house and this house is old with all real doors on the closets so they work great.
DSC_0021

DSC_0022

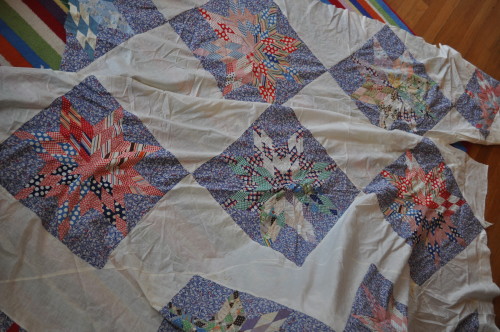
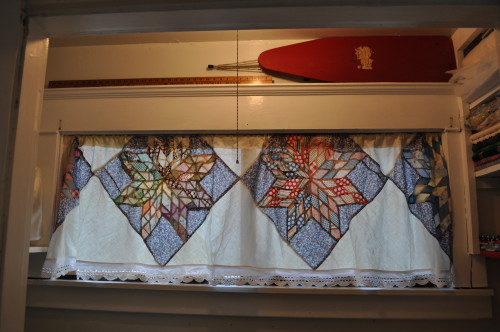
The next day, when the floor was dry, I went ahead and made a little curtain for the window. For a particular part of the afternoon, the sun actually bounces off a metal piece on my sewing machine and nearly blinds me. Plus, at night when I’m in there with the light on, you can totally see in from the street and sidewalk so I kind of feel like I need a little privacy. Anyone who sees me in the closet at night probably thinks I’m nuts just standing there looking down, real serious. Anyway, I was trying to pick some fabric from my stash for the window, which is kind of giant for a closet btw. It’s like 60″ wide or something. Then, I remembered I had this really great old quilt top.
DSC_0026

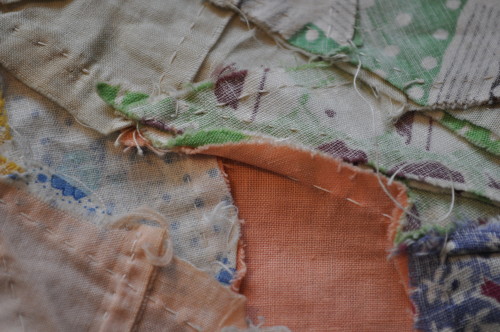
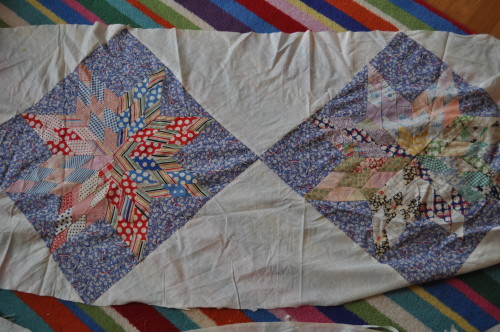
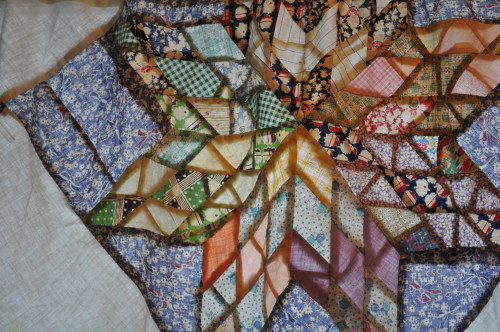
(See how I try to put things back together for a “before” picture after I’ve already cut them apart.) It’s really old and completely hand pieced with all kinds of scrap fabrics from clothes and whatnot. I love it.
DSC_0028

It’s a little tattered and stained in a couple places so I was okay cutting into it. I cut this panel from it.
DSC_0027

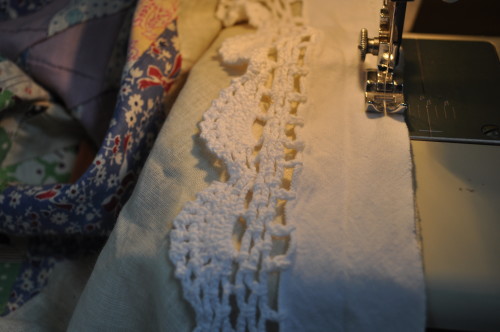
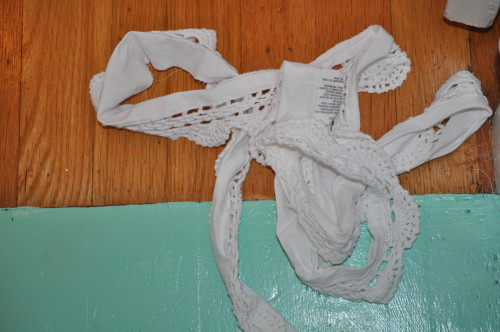
I added this old trim I had cut from a tablecloth onto the bottom of the curtain.
DSC_0032

DSC_0031

I think it turned out well and it’s a constant reminder that I want to hand piece a quilt one day before I’m too old to thread my needle. My favorite part is a piece I noticed that was sewn on backwards which is totally how I do things. Perfect.
DSC_0033

It’s super thin so it still lets a lot of natural light into the space during the day. It’s like quilt stained glass…
DSC_0035

After the curtain, I put some of the main stuff back into the closet and continued to sort through everything. This is the piece that goes on the right side of the closet. It’s a great piece of furniture. Not only does it fit perfectly inside, no skill saw required; but it’s on casters so it goes in and comes out easily. My large ironing pad fits perfectly on top and it has lots of storage below.
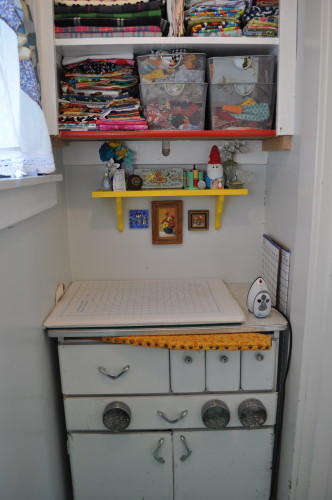
DSC_0041

And I can take the iron pad off and slide it along side if I want a cutting mat on it instead. It also has a little built-in, pull-out ironing board that I covered with insulated iron stuff and fabric which works great with my mini iron. It’s an old piece; cute and handy. (Thanks mom:))
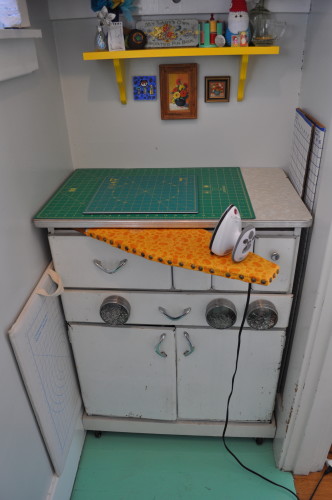
DSC_0047

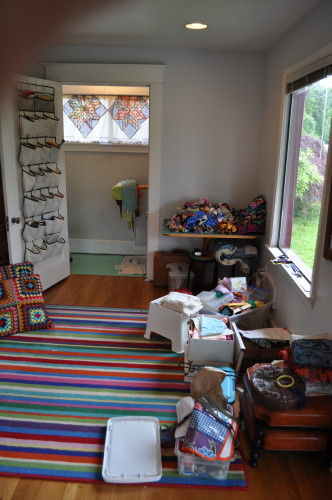
So, here is the mess at the end of day two…getting better…
DSC_0038

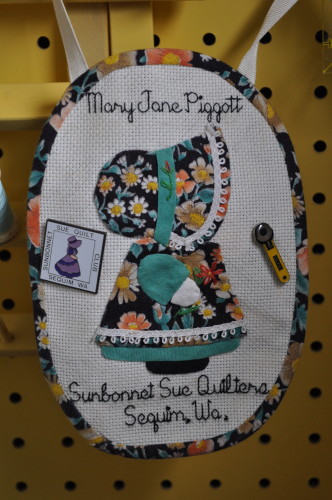
The next day I sorted through the last of the stuff and put the finishing touches on. I added the badge my grandma made as an official member of her local quilting guild. I think it was like the “blood-in” for her quilt gang.
DSC_0020

I also spray painted this little shelf that I already had lying around (yay free!) and hung it above my cutting/ironing cabinet for some of the little things I like to gaze upon. You can see where the coat hanging rod went in.

DSC_0048

Here is the left side with everything. My sewing machine table is actually a wooden Ikea computer desk that lost several inches of each side to a skill saw. With the sides went all the legs and Dave permanently attached it to the wall at the right height for seated sewing. The keyboard pullout works well as a drawer where I store extra machine needles, oil, etc. I hang my thread spool rack, bobbin organizer, and cutting rulers on the peg board. And there’s extra overhead shelving for whatever. You can see the hole where the other end of the coat hanging rod used to be.
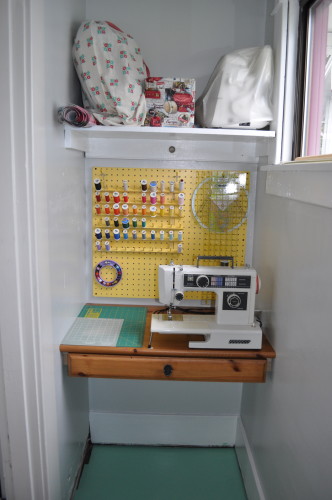
DSC_0018

This was the mess as I began the final day.
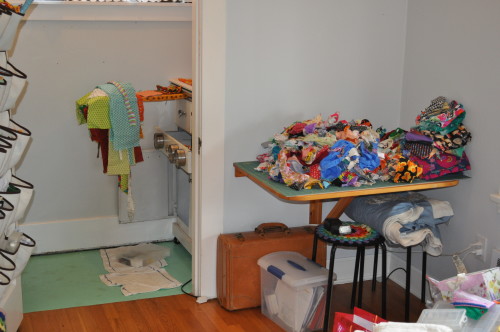
DSC_0040

Here is all the stuff I got rid of!

DSC_0049

If you’re wondering where the coats are; there’s a big armoir just outside the coat closet that holds the coats and the dogs’ bed is in the bottom section. Also just outside the closet is a collapsible table that is attached to the wall that is nearly the exact size of my giant cutting mat, in case I need to do some major cutting. Dave hates the table but he loves me, so here we are… (It makes a wonderful puzzle table too!)
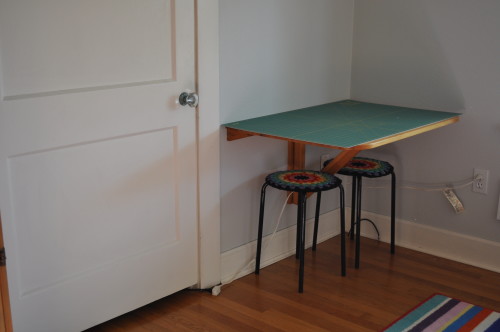
DSC_0050

House stuff

I’ve been doing some things around this house lately, like paper organizing and minor gardening for lazy beginners. And I actually found all the parts to my camera and replaced the parts that were “lost in the move” and remembered to actually take some pictures.

Spring and tax time is coming and I always feel the need to purge files at this time of year. I actually get a tiny bit excited about it because I’m a weirdo. Normally, the annual file purge process involves me going all the way through our two, two-drawer file cabinets and burning up a crappy little paper shredder that seriously stops working forever.

DSC_0009

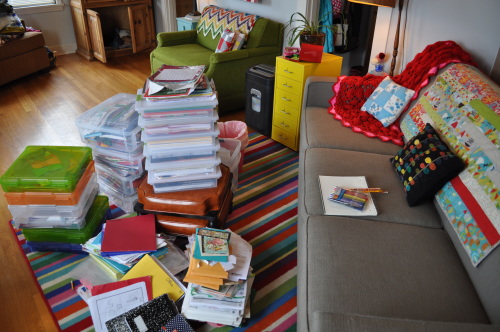
This year; however, instead of just going through the old file cabinets, I decided to change the whole way we manage and store papers. So in addition to dumping out both file cabinets and selling them on Graig’s List, I mean Craig’s List; I went through the house and gathered literally all the paper (specifically all the piles of papers that I never want to deal with like school papers and cards and cute stuff the kids make – even the giant pile of paper crap that I put in the corner of the basement when we moved here hoping our basement troll would eat it or burn it or something) and dumped it in the middle of the living room.

DSC_0016

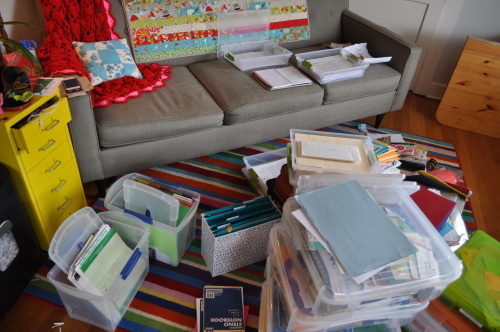
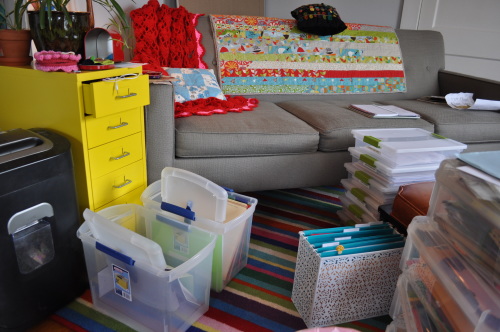
Additionally, I surrounded myself with necessities for this long and strangely exciting task: a trash can, recycle bin, chocolate, water, music, and my best friends. Plus, I stationed myself on our new used Mad Men couch that I love. Dave put me on a lifetime restriction from love seats because when we moved last year, we had four to six depending on your definition of “love seat”; and zero couches, which apparently makes couch napping difficult. Mad Men couches (a.k.a. mid-century modern couches from Macy’s via Craig’s List) are perfect for couch napping. Just watch Mad Men and you’ll see; though the line there between napping and sleeping off a mid-morning workday drunk is blurred. Anyway, problem solved. Back to paper business. Notice the butt print on the couch so you know I was working at paper sorting and shredding.

DSC_0019

If your eyes aren’t twitching too hard from all the crap in these photos, I will point out some of my solutions to the ongoing problem of random paper piles around the house. Up until now, I had a file for everything that I thought I needed to keep long term. But I didn’t have a place for all the everyday short term paper that makes a temporary home in the kitchen or wherever until we don’t need it. So, I had those clear plastic lidded paper boxes that are stacked on or near the couch. I’m keeping long term stuff in those and not wasting too much energy categorizing it as I don’t need to access that stuff much.

The 12×12 inch scrapbooking boxes are labeled for each kid and for each school year. The size works well for all their school papers and art projects, plus birthday cards, etc. I get rid of plenty though too. A word of advice: don’t put the kids’ purged art work in the recycle bin. Shred it. Otherwise, the kid you ask to take the recycle out later may end up in tears. I’m not saying that happened to me. I’m just saying it could happen; that’s all. Now, you may be saying to yourself, “Why does she think that all these boxes are going to take up less valuable real estate than two file cabinets?”. Well, I will tell you why…mainly because we have little floor space in this house but there are several shelves in the basement for the boxes. Plus, I couldn’t get the file cabinets up on the shelves.

DSC_0021

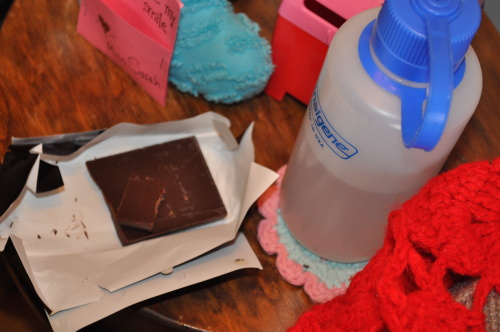
My chocolate is laced with espresso. See? Just joking; not about the espresso, just that I’m pretty sure you can’t see the espresso in the photo. Oh, and if you’re wondering why my best friends are ducking out of all the shots, they’re not. I was referring to my label maker and my shredder. My latest shredder. The one that hasn’t died. It’s amazing. I shred pizza delivery boxes in there like all the time. No I don’t. I don’t know why I said that. I just got excited about the shredder. I totally could though. I bet. But I wouldn’t because I would feel like a real tool if I broke it with a pizza box.

DSC_0023

Finally, my solution to the everyday short term stuff is the cute little open top baby file holder on the floor that is going to hold all the crap like the kids’ homework and receipts and bills and a couple other week to week things. And my genius idea to further prevent kitchen paper piles is to keep that little thing in the kitchen. We’ll see.

Oh, and look what happened in the kitchen. We (by we I mean Dave) took out the super old cabinets and replaced them with super free cabinets that our really awesome neighbor friends hooked us up with.

DSC_0001

We are about half way there. I wish I was better at before pictures but I’m not. The vacuum is there because the counter tops are temporarily plywood and I can’t exactly wipe them down with a dish cloth like normal people do.

DSC_0003

We (again Dave) exposed some festive 1925 brick that Dave assures me will be sealed up somehow so that it’s pretty but doesn’t shed into our food.

DSC_0004

Oh, and btw, those cute little under-cabinet lights get really really hot so I would suggest not using them until they are all the way installed; like actually attached to the cabinets rather than dangling against the wall.

DSC_0007

I’m getting a little tired of vacuuming the counter tops every time I cook, but I am finding all kinds of project patience. Counter tops can’t be far now.

Today I made a $4 investment in a hopeful kitchen herb garden. I was at Target today for TP, toothpaste, and dishsoap. Of course, Target happened in its usual way and I left with those three things, plus tank tops, a burlap sack (true story), herb seedling kits, and cute little chalk labels. So, herbs. We have a perfect kitchen window for that sort of thing. This is the first house we’ve lived where plants actually thrive inside. I’m going to give it a go.

DSC_0001

They certainly are cute. Though I’m impatient and lazy so I wrote on the chalk labels in No. 2 pencil instead of chalk because I had a pencil handy but not a piece of chalk. I did have a chalk marker handy but I’m pretty sure I didn’t use it because part of me expects these little plants to die and I don’t want those cute little labels to be ruined. We’ll see.

DSC_0006

I am just now realizing that when I stand on a stool to take a close up photo of cute little herb seedlings in my kitchen window; to a passerby, it actually appears that I’m standing on a stool to take a photo into our neighbor’s window. City life.

Posted in Miscellaneous, Organizing | Tagged , , , , , | Leave a comment

Long time, no post…

IMG_2332

So, I guess I can say that I’m consistent at being inconsistent, right? Is there any scenario where that’s a good quality and not a character flaw? I don’t have any excuses for not blogging in 11 months. Actually, I have buckets of excuses, but that’s all they are. All I can say for sure is that we moved and it was a huge deal for me and it seems like last week, not last December. Maybe I need a therapist because every time I think about the move, I feel like crying. On the other hand; every time I think about where we are, in both time and space, I smile. For now, I’ll just stick with the smiling. We’ve got so much to smile about these days.

We are in love with the house we bought in Seattle. Even though it’s tiny. Really tiny. Tiny. I’ve embraced it as a challenge…figuring out how to really live in a small house after living in a more sprawling space. Note that I said “challenge”, not “race”. Anyway, we’re making progress. And I think we’ve convinced the girls that the previous owner’s cat door to the basement is not a laundry shoot. That’s what we get for our temporary stay in a fancy house with a laundry shoot… Seriously; nothing like figuring out the reason the door to the basement stairs won’t open is because there is a giant mountain of dirty kid clothes on the other side of it.

I have so much to share…I’m taking pictures with the good camera again…reconnecting with old friends…teaching others how to do what I LOVE to do…neighbors we truly like…a school everyone is happy with…an awesome part-time job…still no need for before or after school kid care (yay)…seeing family more than annually…lots and lots of crafting.

It’s happening.

Posted in Crafts | Leave a comment

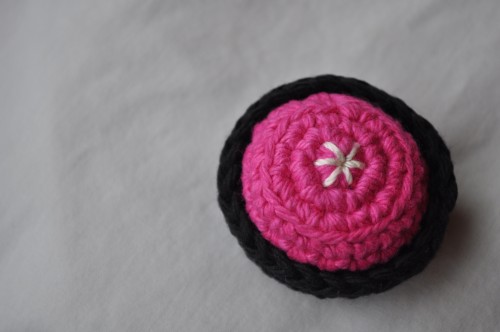
Just in time for Valentine’s Day…a truffle!

DSC_0002

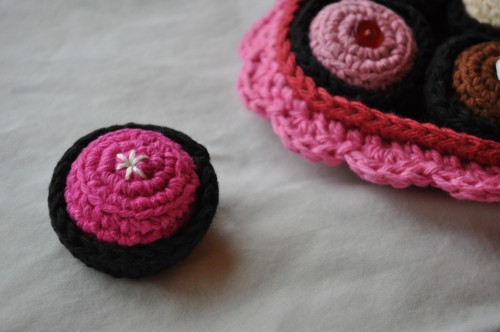
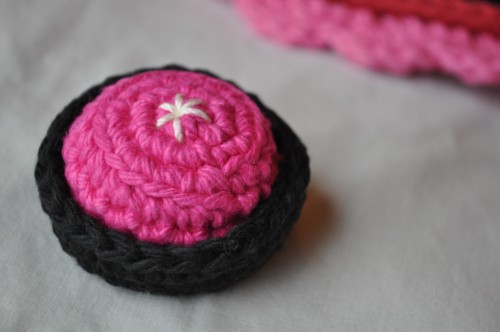
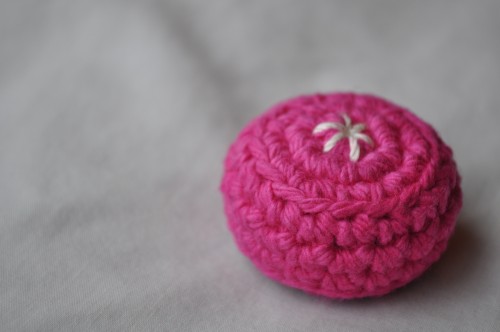
This little truffle is from the original box of truffles that I did a while back. I didn’t write any of it down when I originally made it, and while the truffles are simple, I did need to make another set of truffle and wrapper to check the patterns.

DSC_0003

This is a quick and easy single crochet, in-the-round pattern. I used a size F hook and worsted weight cotton yarn in truffley colors and black for the wrapper. You’ll also need a tiny bit of stuffing and you may want to add a tiny decoration for the top of the truffle like I did.

DSC_0007

Truffle Pattern:
The truffle is worked from the top to the bottom so if you’re doing a two-tone truffle, start with the topping color and change to second color at round 5.
Make an adjustable loop.
Truffle is worked in a spiral; do not join rounds.
Rnd 1: 6 sc in loop (6 sts)
Rnd 2: 2 sc in ea st around (12 sts)
Rnd 3: (1 sc in next st; 2 sc in next st) 6 times (18 sts)
Rnd 4: sc blo (back loop only) in ea st around (18 sts)
Rnd 5: sc in ea st around (18 sts)
Rnd 6: sc in ea st around (18 sts)
Add the decoration to the top of the truffle at this point.
Rnd 7: sc blo in ea st around (18 sts)
Rnd 8: (sc in next st, sc2tog (or dec)) 6 times (12 sts)
Add a small amount of stuffing to the truffle.
Finish off and leave a 6 inch tail.
With a yarn needle, whip stitch every other st around and cinch up the opening. Pull it tight and weave in the end.

DSC_0012

DSC_0010

Wrapper Pattern:
With black, make an adjustable loop.
Wrapper is made with joined rounds.
Rnd 1: 6 sc in loop, join with sl st in first sc (6 sts)
Rnd 2: 2 sc in ea st around, join with sl st in first sc (12 sts)
Rnd 3: (1 sc in next st; 2 sc in next st) 6 times; join with sl st in first sc (18 sts)
Rnd 4: (1 sc in next two sts; 2 sc in next st) 6 times; join with sl st in first sc (24 sts)
Rnd 5: sc blo (back loop only) in next st and in ea st around; join with sl st in first sc (24 sts)
Rnd 6: sc in next st and in ea st around; join with sl st in first sc (24 sts)
Finish off and weave in end.

DSC_0005

DSC_0014

Posted in Crochet | Tagged , , , , , , , , , , , , , , , | Leave a comment

We made it!

20140105-090214.jpg
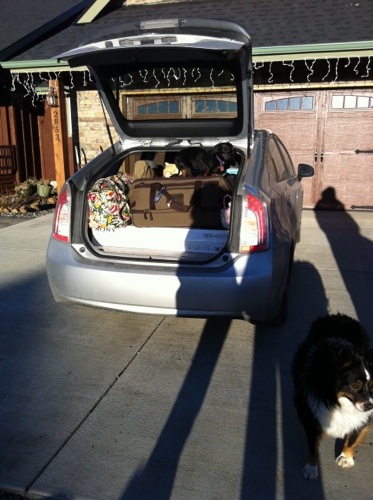
We made it all the way from Fredericksburg to Seattle this weekend and are finally figuring out how to move forward a tiny bit. The trip was as expected for the most part. We left last Sunday and arrived Friday evening. The weather was pretty good as it appears we dodged a huge winter storm in the mid and east.

20140105-090432.jpg

We were able to spent a little time with good friends along the way.

20140105-085959.jpg
We are so lucky to have friends in various places who are more than happy to drop everything and put us up for a night.

20140105-090138.jpg

I discovered that I don’t take pictures when I’m cold. And I was cold for most of the trip. Negative 2 was the lowest I saw according to the car.

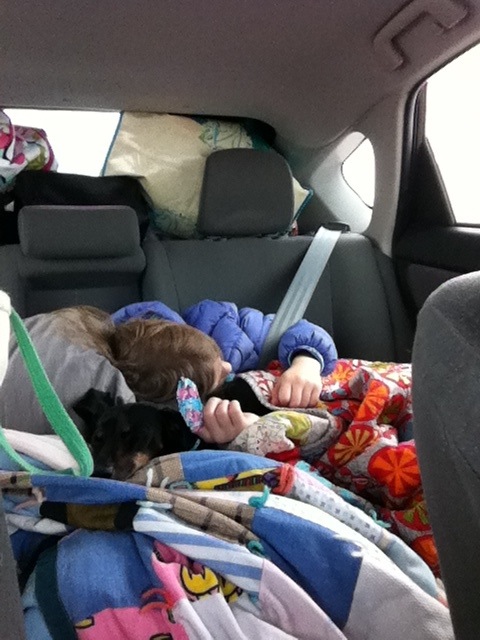
The kids were awesome travelers and did not complain a single time the whole time. Seriously. Not even any whining. And we were in the car for 12 hours; 16 hrs; 8 hrs…a lot of potential for complaining. We don’t even have car movies.

20140105-091807.jpg

Only car troubles included getting an oil change in Butte and having the driver side mirror vandalized to death in Sioux city. I like to think it was a drunken parking lot roundhouse kick that was poorly executed, but apparently effective, with a beer in hand and a possible lost shoe. You can imagine, since it was New Year’s Eve and all.

20140105-091359.jpg
We are here. All in one piece. Sad to leave; happy to arrive. We made it!

Posted in Organizing | Tagged | 1 Comment

One day to move

So the past week or so has been hard core moving…packing,loading, cleaning, crying, fixing, getting rid of, deciding, Christmas, more loading, hoping, planning, more cleaning, more fixing, painting…

20131228-123604.jpg

Oh, and BTW, we have too much stuff.

20131228-124532.jpg

This was when I was still having fun with the whole moving process. That ships has since sailed.

20131228-124713.jpg

It’s a good thing the PODS were picked up already because setting them on fire was looking like an appealing option. Not really. I hate getting in trouble. Seriously though, burning everything to the ground would make this move a lot simpler.

20131228-125855.jpg

Also, I don’t recommend loading a POD alone. Approximately half of this tower of stuff fell on me before I roped it off.

20131228-130516.jpg

Christmas was not a disaster. Thank god for other people’s grandmas who have their own cotton candy machines on Christmas Eve.

20131228-131009.jpg

And also, thank baby Jesus for wonderful friends who bring Christmas dinner fixings over on Christmas Day and actually cook all day for us while we work away on last minute stuff. Seriously, how do we keep making friends like these. I’m in awe. Did I mention we haven’t seen the kids in days because as soon as sh*t got really real and our house was no fun, said friends took them away to have all kinds of post holiday fun at their house? With a pet hedgehog to bathe, even?!

Posted in Organizing | 1 Comment