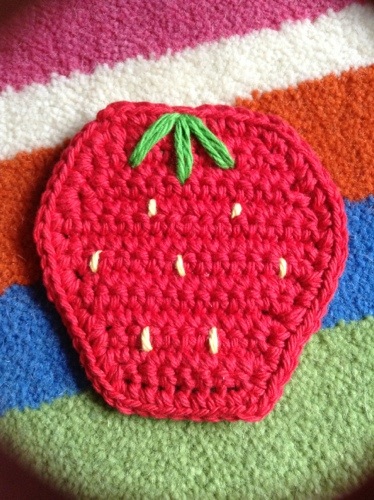
I made a cute little strawberry coaster from the Summertime Flip Flop Coaster pattern and I didn’t change anything except I sewed on hull leaves and seeds instead of a strap. So easy and cute!
I made a cute little strawberry coaster from the Summertime Flip Flop Coaster pattern and I didn’t change anything except I sewed on hull leaves and seeds instead of a strap. So easy and cute!


Below, I put together a heavily photo laden tutorial on how to make these cute coasters; but if you just want the quick pattern, here it is:
Note: This pattern is worked in rows with an edging and a surface crochet detail for strap; ch 1 and turn at the end of each row except last.
With a G hook, ch 9
Row 1: sc in 2nd ch from hook, sc in ea ch across (8 sc)
Row 2: 2 sc in 1st st, sc in next 6 sts, 2 sc in last st (10 sc)
Row 3: 1 sc in ea st across (10 sc)
Row 4: 2 sc in 1st st, 1 sc in next 8 sts, 2 sc in last st (12 sc)
Row 5: 2 sc in 1st st, 1 sc in next 10 sts, 2 sc in last st (14 sc)
Row 6: 1 sc in ea st across (14 sc)
Row 7: 2 sc in 1st st, 1 sc in next 12 sts, 2 sc in last st (16 sc)
Row 8 & 9: 1 sc in ea st across (16 sc)
Row 10: sc2tog, 1 sc in next 12 sts, sc2tog (14 sc)
Row 11: sc2tog, 1 sc in next 10 sts, sc2tog (12 sc)
Row 12: 1 sc in ea st across (12 sc)
Row 13: sc2tog, 1 sc in next 8 sts, sc2tog (10 sc)
Row 14: sc2tog, 1 sc in next 6 sts, sc2tog (8 sc)
ch 1, do not fasten off, do not turn
Work edging to the left around the coaster in the row ends and between rows as follows:
Left side: (1 sc in next sp, 2 sc in next sp) 6 times, 1 sc in last row end (19 sts)
Lower left corner: 2 sc in first unused loop of foundation chain
Bottom: 1 sc in next 6 unused loops of foundation chain
Lower right corner: 2 sc in last unused loop of foundation chain
Right side: (1 sc in next sp, 2 sc in next sp) 6 times, 2 sc in last row end (20 sts)
Top: 1 sc in ea st across top (8 sts)
skip ch at beginning of edging and sl st to 1st sc of edging
fasten off
Straps: Change color and switch to a size H crochet hook. Eyeball the center of the strap and surface crochet down and to the left for the left side of the strap; cut yarn and begin again at the right edge, surface crocheting up and toward the center for the right side of the strap until they meet, leave a bit longer tail for the center detail. Thread the tail on a blunt needle and sew two long stitches, stopping just below the top edge of the flip flop. Fasten off and weave in all ends at the back.


Below is the super long photo tutorial…

You’ll need two contrasting yarns (I used Lily cotton Sugar and Cream), and two hooks – G for the main part and H for the straps, plus scissors and a large eye blunt needle
With a G hook, chain 9

Row 1: sc in 2nd ch from hook, sc in ea ch across (8 sc)

Ch 1 at the end of each row before you turn

Row 2: 2 sc in 1st st

sc in next 6 sts, 2 sc in last st (10 sc)

Row 3: 1 sc in ea st across (10 sc)
Row 4: 2 sc in 1st st, 1 sc in next 8 sts, 2 sc in last st (12 sc)
Row 5: 2 sc in 1st st, 1 sc in next 10 sts, 2 sc in last st (14 sc)
Row 6: 1 sc in ea st across (14 sc)
Row 7: 2 sc in 1st st, 1 sc in next 12 sts, 2 sc in last st (16 sc)
Rows 8 & 9: 1 sc in ea st across (16 sc)
This is the widest part of the project; the rest will be decreasing

Row 10: sc2tog


1 sc in next 12 sts, sc2tog (14 sc)

Row 11: sc2tog, 1 sc in next 10 sts, sc2tog (12 sc)
Row 12: 1 sc in ea st across (12 sc)
Row 13: sc2tog, 1 sc in next 8 sts, sc2tog (10 sc)
Row 14: sc2tog, 1 sc in next 6 sts, sc2tog (8 sc)

ch 1, do not fasten off, do not turn

Work edging to the left around the coaster in the row ends and between rows as follows:
Left side: (1 sc in next sp, 2 sc in next sp) 6 times, 1 sc in last row end (19 sts)


Lower left corner: 2 sc in first unused loop of foundation chain


Bottom: 1 sc in next 6 unused loops of foundation chain
Lower right corner: 2 sc in last unused loop of foundation chain

Right side: (1 sc in next sp, 2 sc in next sp) 6 times, 2 sc in last row end (20 sts)


Top: 1 sc in ea st across top (8 sts)

skip ch at beginning of edging and sl st to 1st sc of edging


fasten off

Now let’s make the straps

Begin at the center of the strap and work the left side of the strap from center out toward the left edge of the flip flop.
With yarn at the back of the project and hook at the front, insert hook through a space that is approximately in the middle of the flip flop and three rows down from the top.

Pull yarn up through the flip flop so the hook is at the front with one loop on the hook.

Next, insert the hook from front to back in the next space that is approximately one space down and to the left of the first.

Yarn over and pull the loop up to the front of the project.

Continue pulling the hook through the first loop on the hook.

Continue the process until you’re at the left edge.


Cut yarn, leaving a short tail to weave into the back of the flip flop.

For the right side of the strap, begin at the right edge of the flip flip.


Work with the same process as for the left, but this time, work upward and toward the center as you go and end so that the right and left straps meet at the center.

Leave a tail about six inches long.

For the between the toe part of the flip flop, thread the six inch tail of the right side strap onto a blunt needle.

Insert it down through a center space about two rows above the center of the strap.


Sew two of those stitches.

Weave the tail into the back of the flip flop and trim.


Enjoy!
I’m not even going to bring up the fact that I haven’t blogged since Valentine’s Day…wait… Never mind. Anyway, it’s not for lack of making. Plus, there was this brief interlude:

That’s me in the orange! No, really. Here’s my ticket and everything.

Okay, that one was supposed to be portrait and I’m still getting used to taking pictures with my new Mother’s Day iPad mini (which is super cute btw). I digress.
School’s out next week and I actually have teacher gifts ready one whole week in advance, which is a first for me. The last day of school won’t involve buying gift cards in the Starbucks drive-thru on the way to school (which isn’t actually on the way to school at all). No, none of that this year. I decided to take a different approach because I think teachers end up with a bunch of crap they can’t use – there goes my filter again, sheesh. Plus, one of my friends who teaches preschool confessed that she received like eight insulated cups at Christmas. I figure that if its been on Pinterest; teachers will receive at least ten of them.
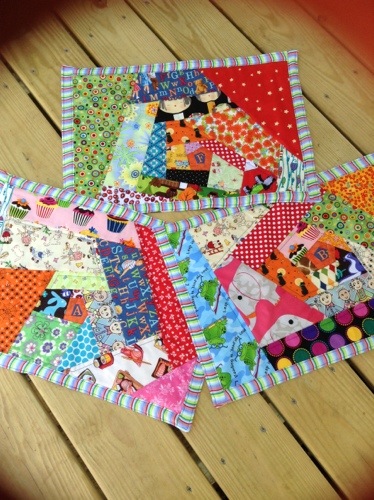
So, for the Kindergarten teacher who has three tiny grand kids, I made these cool “I spy” quilted placemats that include a little monogram for each kid. (Inspired by these that i made for my two.). I’m referring to them as “Grandma’s house placemats” so she can keep them at her house. I hope she likes them. I do.
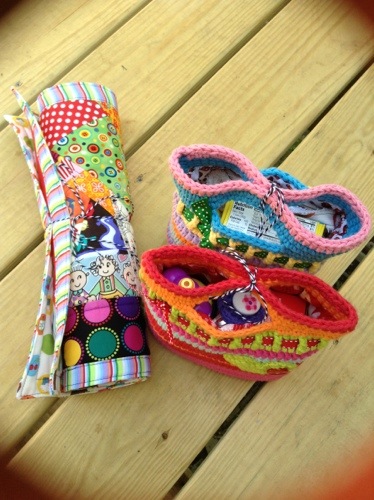
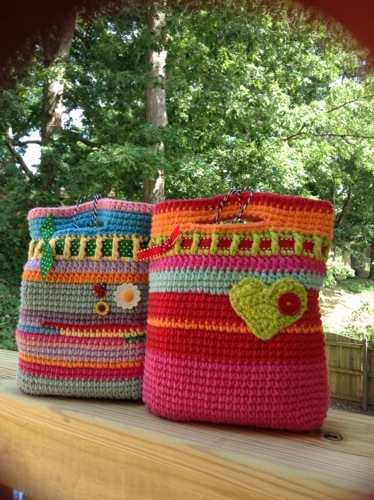
Sticking with the kid theme, I made the first grade teacher’s two very little ones each a snack tote with snack goodies inside. (Actually, I shopped in my own etsy store for the totes, so that one was easy, but I did make a bib for the littlest one.)
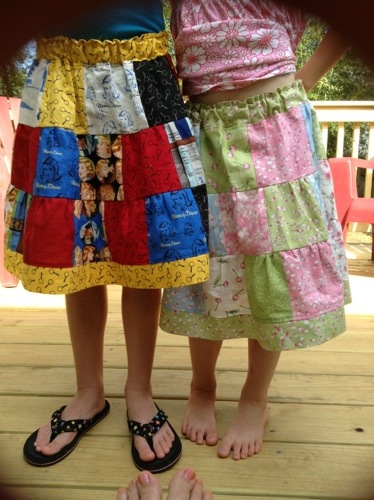
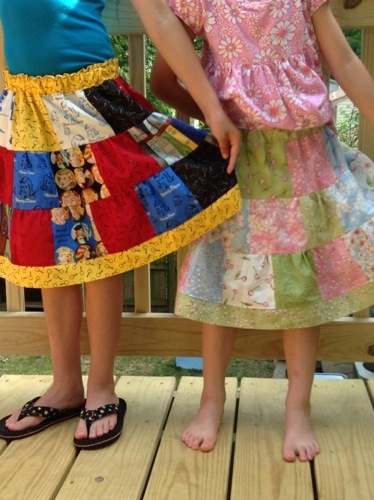
And, finally, I stayed up last night making these skirts for the girls because word got out that they were in the works and could possibly, maybe get made in time to be worn to school today and at that point, there was no turning back. Plus, we just finished our first Nancy Drew book last night (while one kid flopped all over the couch and nearly died of boredom and the other one was on the edge of her seat until the last word).
Luckily, they were super easy and I love how they turned out. I used these fabrics, half of which I already had, so I only spent about twelve dollars to make it happen.
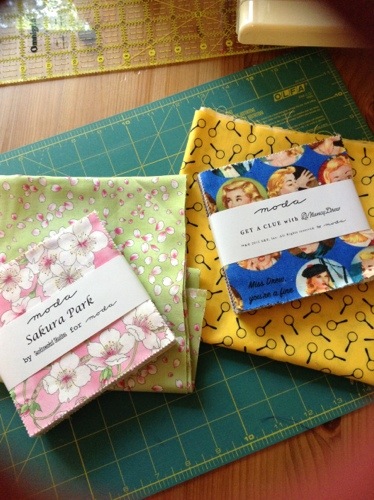
I used the Missouri Star Quilt Company “Adorable Charm Pack Skirt” video tutorial and it was wonderful. She even uses a gathering trick that I’d never seen before. Anyway, if you like precut fabric (I have recently become kind of obsessed with it), check out their tutorials; you will not be disappointed. Or, you could be I guess…
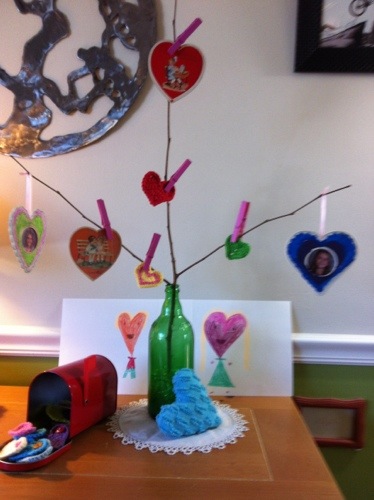
Don’t you love the heart-head portraits if Dave and me? (I’m even wearing high heels!). Happy Valentine’s Day!

Update!: So, I may be the worst friend ever and neglected to give photo credits to Katie (sorry Katie) – nice pics, right?!
I invited my lady friends over for a “Crafty Cocktail Night” with no boys or kids even, and it was awesome! (Technically, this is not the first time I’ve done this, but this is the first time that we actually did the ‘crafty’ part instead of just focusing on the ‘cocktail’ part – which, it turns out, is way less productive.)
Anyway, this time we had cocktails for sure (and even some food :)), but we also made pajama pants! I invited nine, five came, and three made pants (plus me of course!). And three of us even came away from the evening with two whole pair of finished flannel pajama pants for kids – that is quite successful, don’t you think???
I had been wanting to do something like this forever, and after one rather unproductive (but still fun) attempt, I think we nailed it! Simplicity was the key. I had soup on the stove with all the toppings, etc. on the counter and everyone pretty much ate at their leisure (or when I strongly suggested it), holding their bowls, standing in the kitchen (because the dining table was our work surface and everyone was way too scared to eat near my favorite best new rainbow rug (what can I say? hospitality is my middle name).
I chose an easy project – kids pajama pants – and had everyone bring their own fabric and elastic (plus their cocktail of choice – stick to the plan, right?). Then, I showed everyone how to make the super simple pants – a really simple and nice example of the easy way is shown here.
And then we went crazy.


It was a wonderful feeling to have two pair of birthday gift jammie pants finished – early even! Bikes and snakes – so cute…I hope he likes them.

See all the thread debris I noticed the next morning on my rug (as I was attempting to re-hydrate), and we weren’t even sewing on the rug – proof of the fantastic sewing frenzy that took place the night before. Good times.

…and we’re planning to do it again. 🙂

I am so in love with the new thing I made for myself! I am totally smiling because I saw something I wanted to make and I sat down and made it and it came out great! Plus, it was fast and I didn’t make any mistakes, which is a huge deal because usually nothing I make is without mistakes and while sewing is faster than crocheting, I would rarely describe it as ‘fast’.
Anyway, I’m a sucker for scarves (and have pretty much driven that trend into the ground), but it’s also a practical habit because they keep my neck warm – even in terrible summertime air conditioning!
This is the Patricia Infinity Cowl from luvinthemommyhood and I am so happy I made it and equally happy that it was available as a free tutorial to be made!

It’s just such a simple and cute idea and I am a fat quarter junkie so I didn’t have to buy any new fabric to make it. Plus, the most magical part of the project was that I pulled out six fat quarters from my stash that were all from various sources (not a collection) and the first six were perfect together! Perfect!

That never happens to me. Ever. I am usually digging through my stash for at least as long as the project I’m pulling fabric for is going to take me. Now, don’t get me wrong; fondling fabric is one of my favorite activities, but sometimes fabric selection can seem like such a time-suck. Anyway, here are the fabrics and they are totally random. Although, I think the green daisy number is also a Kaffe Fassett, but not of the same collection. Plus, I have one cheap-o Joann quarter in there even.

I love the project and the tutorial diagrams were nice. I have to say though, if I wasn’t already experienced in sewing, I would have had some trouble at the end, putting the two ends together, but I figured it out.

I’m just really happy with this and wanted to share. I am also thinking about a modified kid-size version or skirt…??? 🙂

So, here’s a quick and easy (and cheap!) little Valentine idea for kids.

I took a coffee filter and folded it in half and added three jumbo message heart candies inside. Then, I folded the sides in toward the middle and folded the top down (and played with it a little to make it actually resemble a tea bag), and stapled it at the top.

I stapled a little piece of twine to the top of the bag as well with a little heart I punched out of red paper. I made a tiny tag out of the red paper and tied that to the other end of the twine where the heart was punched out.

You could use “cu-‘tea'”, or maybe “smar-‘tea'” also. And for a non-candy version, you could put in a tattoo or stickers or something…

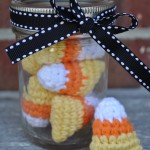
I wanted to make something new and fun and easy and quick and cute for Valentines Day, for no real purpose other than to get in the spirit and have something cute to look at and play with…


I’m really happy with the whole thing, but I didn’t write any of it down. I may make another in order to get a pattern compiled…maybe…
It’s about 5 or 6 inches square and didn’t take a whole lot of time. The truffles themselves are true to size, lightly stuffed and garnished with buttons. My favorite part are the black ‘paper’ liners. That was an afterthought and I am so glad I took the extra step. I also love that the box is actually a box where the lid fits the bottom nicely.
I borrowed the pattern for the itty bitty heart I crocheted for the outside of the box and I love how teeny and super simple and well explained it is. I could make a hundred (itty bitty hearts, not boxes of truffles) :).
Look what I made!!!

Super cute little crocheted bookmarks, if I do say so myself…

…little strawberry and blossom…


…and a little pot of gold at the end of a rainbow. So cute.

Just made them up and not sure they would turn out exactly the same if I tried to duplicate, but I might try one day if I get bored or if someone wants one…one day…maybe…
Those who know me know that I am in love with thrifting in nearly any form…estate sales/thrift stores/roadside castaways…whatever. I absolutely would rather have second hand than new (only solid exceptions are underwear and toothbrushes). Anyway, I have so many times found such wonderful treasures – usually by myself – and have wanted so much to share with someone who would appreciate my finds the same way I do. So, I’ve decided to begin sharing…

I am so tickled by this little bunch of finds – all from the same little local charity thrift shop here in Fredericksburg! (Nearly everything at this shop is terrible overpriced for my thrifty taste, but it’s for charity and my friend volunteers there so when I stop by to chat, I can’t help but find something…you thrifters know how it goes :))
So, the two books are absolutely adorable and in excellent condition. Neither looks to have even been opened for actual reading. I already started Chitty-Chitty-Bang-Bang with the girls and they are enjoying it. The Needlework for the Home from the Homemaker’s Encyclopedia is actually a really neat book that I will probably reference for sewing tips. It covers machine sewing, embroidery, crochet, and knitting. It even has some patterns (a few really cute crochet potholder patterns – my favorite!). A lot of the stuff in there is really practical, as it was written back when nearly everyone was making their own curtains, pillows, etc. (even upholstery…!) Plus, I searched online just for the heck of it and this one is selling for $30 or more (and I only paid $3 – yay!)
Plus, I couldn’t get to this little tea pot fast enough! It is adorable and in perfect condition, in fact my super wanting to be grown up little daughter has been drinking wild berry tea from it twice already. It’s by John Wagner & Sons of Ivyland, PA and made in Japan if anyone cares.
Also, I grabbed up the recipe cards in the smashed up box because all the cards were in great shape inside and really cute and in a couple different styles (plus, people buy these up all the time in the vintage online shops). This is the only one of the bunch that I didn’t plan to keep for myself (and they’re already sold!).
Happy thrifting – go find yourself a treasure!
 Bite-Size Candy Corn
 Chocolate Valentine Truffle and Wrapper
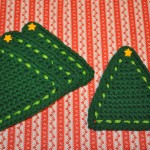 Christmas Tree Coasters
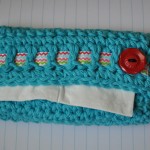 Crochet Tissue Cozy
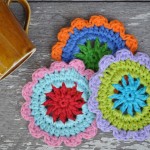 Cute Cotton Coasters
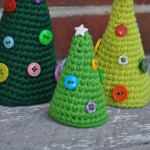 Cute Little Christmas Trees
 July 4th Pennant Bunting
 Mini Frankenstein
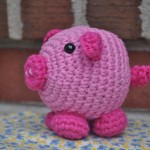 Petunia the Palm-Size Pig
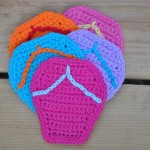 Summertime Flip Flop Coasters
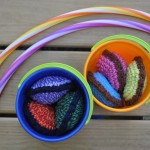 Super Fun Bean Bags
 Sweet Strawberry Coaster
 Teeny Tiny Apple Sweater
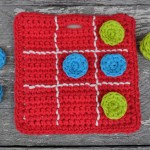 Tic-Tac-Toe Travel Game